Content Status
Type
Linked Node
Signature configuration by PFMS agency
Learning ObjectivesHow to configure DSC signature in PFMS?
Once the agency admin has done the signatory configuration, the following steps are required to configure the DSC signature.
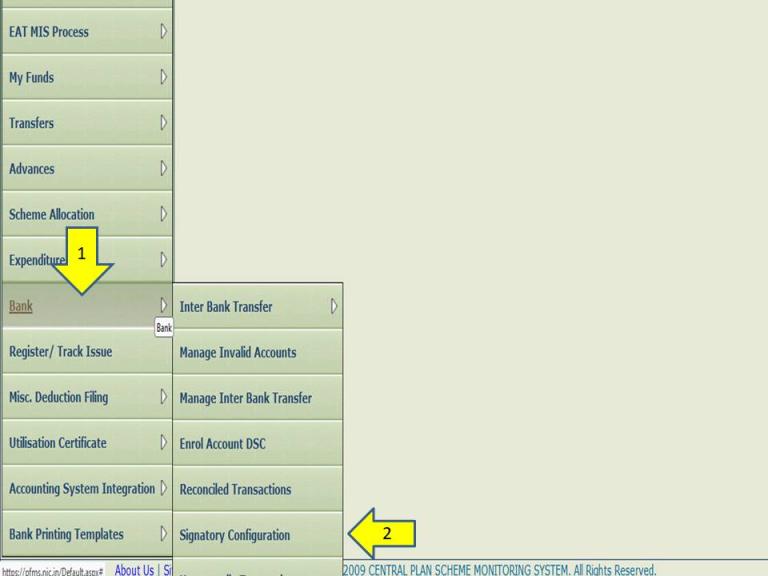
Step-1: Login Admin id -> Go to Bank -> Select Signatory configuration

Figure 1: Signatory configuration
Step-2: Select Scheme -> Select Account Number

Figure 2: Selecting the account number
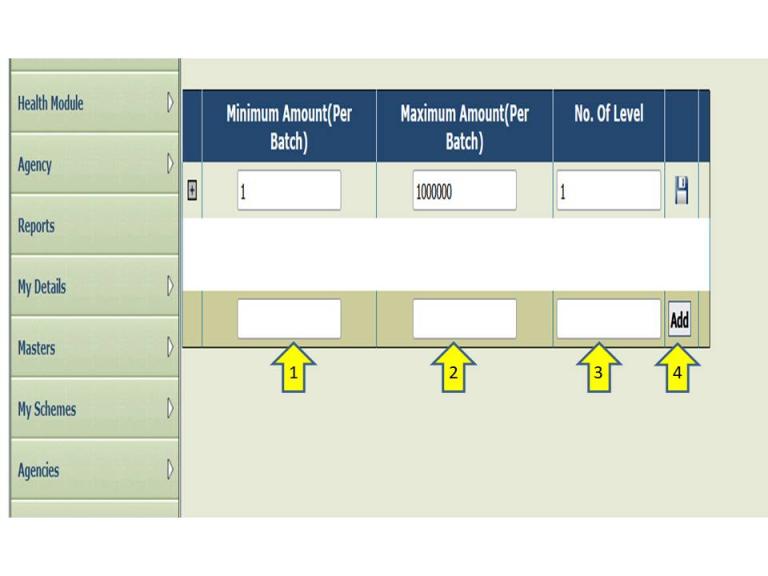
Step-3: Enter the Minimum Amount, Maximum Amount and No. of Level -> Click Add -> Display "amount has been saved successfully" -> Click OK
(Agency admin can change the amount at any time, but they must repeat this step every time they change the amount).

Figure 3: Saving the amount
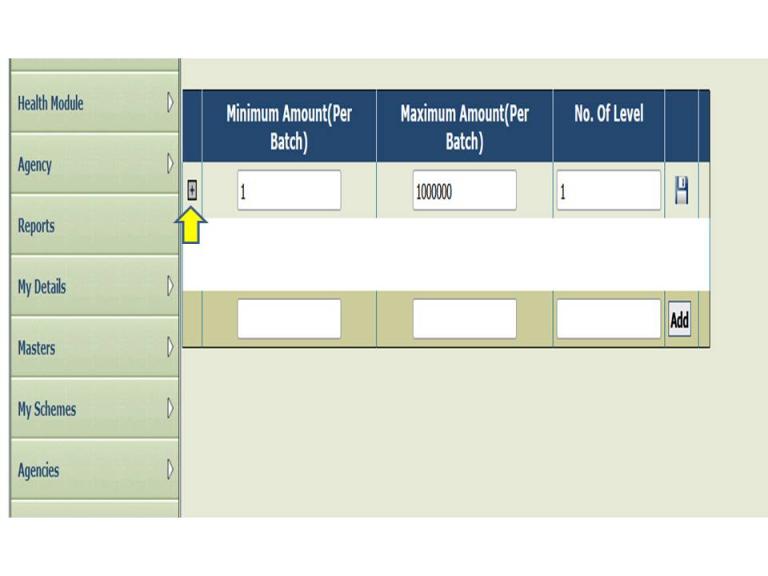
Step-4: Click on (+) to add the details of the Data Approver. If Districts have more than one Data Approver, then the agency admin can add all of them using the (+) option.

Figure 4: Adding the details of the Data Approver
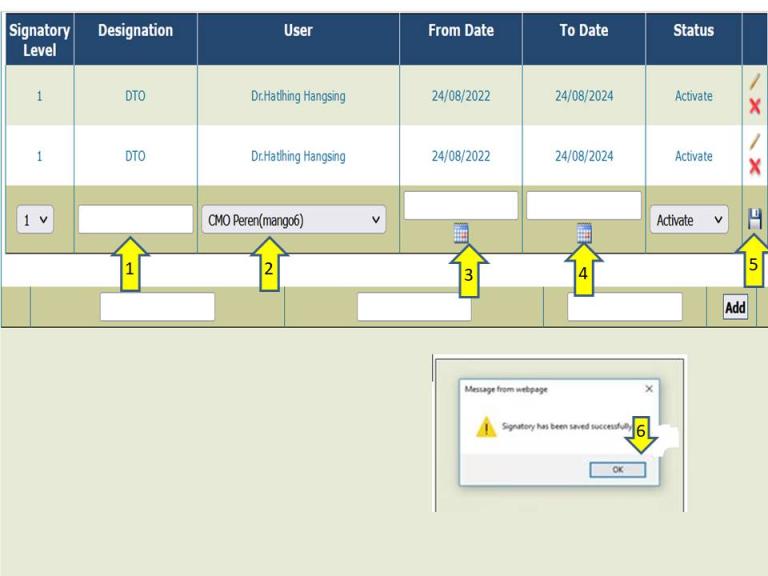
Step-5: Enter the designation of the Data Approver -> Select user from the dropdown list-> Enter From Date(The date on which the DSC key was procured), and To Date (date of expiry of the DSC key) -> Click on Save -> Click on OK -> Signatory saved successfully

Figure 5: Saving the details of the signatory
Resource
Direct Benefit Transfer Manual for National Tuberculosis Elimination Programme, MoHFW, India
Assessment
|
Question |
Answer 1 |
Answer 2 |
Answer 3 |
Answer 4 |
Correct answer |
Correct explanation |
Page id |
Part of Pre-test |
Part of Post-test |
|
Signatory configuration is a one-time activity. |
True |
False |
|
|
1 |
It is a one-time activity, but if the user changes the amount at any time, then they have to repeat step-3. |
|
Yes |
Yes |
|
Only one Data Approver per district can be added to the system. |
True |
False |
|
|
2 |
If Districts have more than one Data Approver, then the agency admin can add all of them by using the (+) option in step-4. |
|
Yes |
Yes |
Content Creator
Reviewer
- Log in to post comments